How to Delete Instagram Reposts | Clean Up Your Instagram Feed
Last reviewed:
Reviewed by / developer: TrackFollows
This guide covers removing a repost you shared. It does not delete the original creator’s post or copies shared by other people. Meta describes reposts as shares of public posts and reels credited to their original creators. Meta’s official announcement
📌 Method 1: Delete Reposts Directly from Feed
① Check the Reposted Content
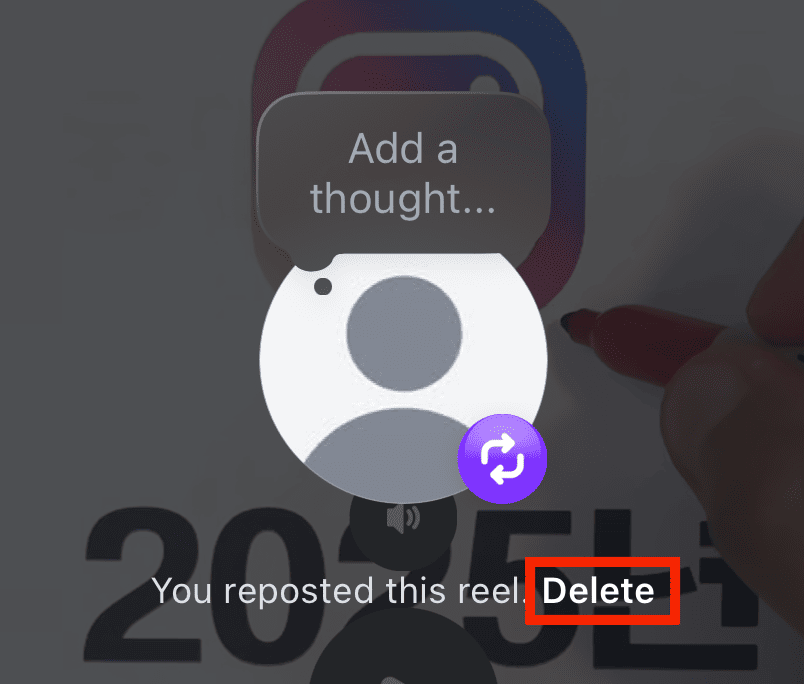
If you see the following message in your feed, it means the content is reposted:
"You've reposted this reel. When you repost, you can share other people's posts with your followers in your feed."

② Click the Checked Repost Button
If the repost button is activated (checked) in the bottom right of the feed, click it.
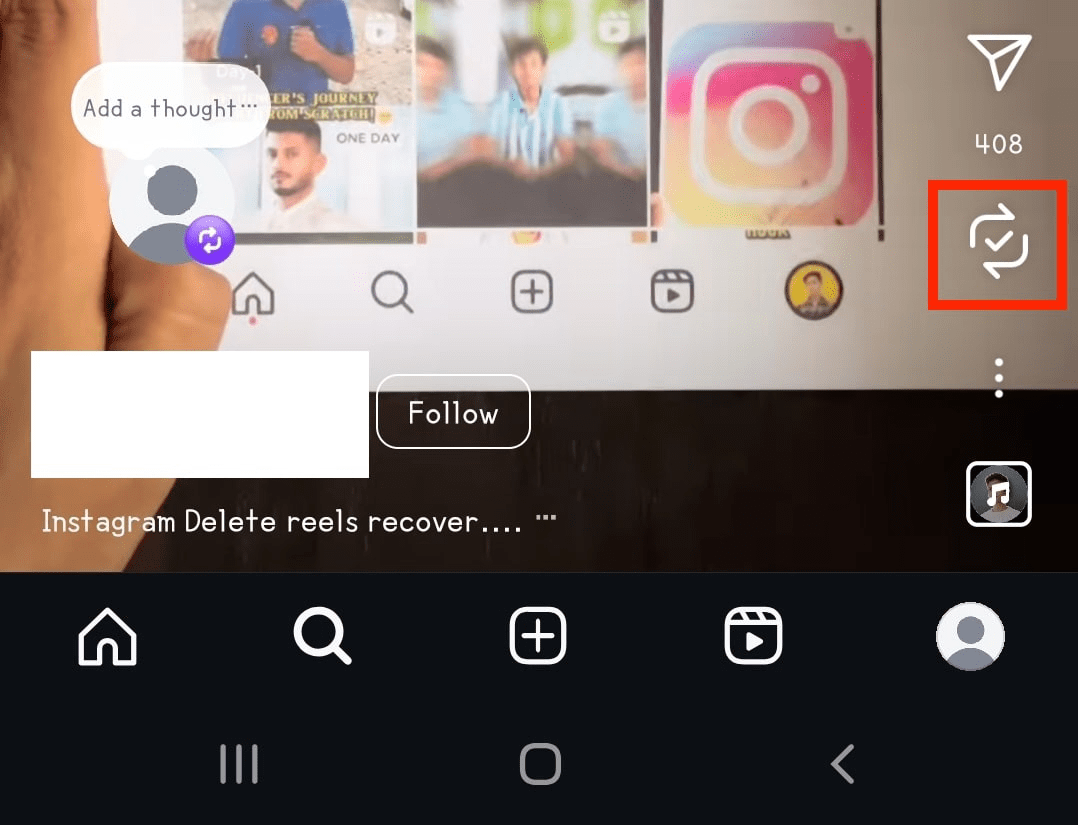
③ Delete the Repost
Below the "You've reposted this reel" message, you'll see a "Delete" button. Clicking this will delete the repost.
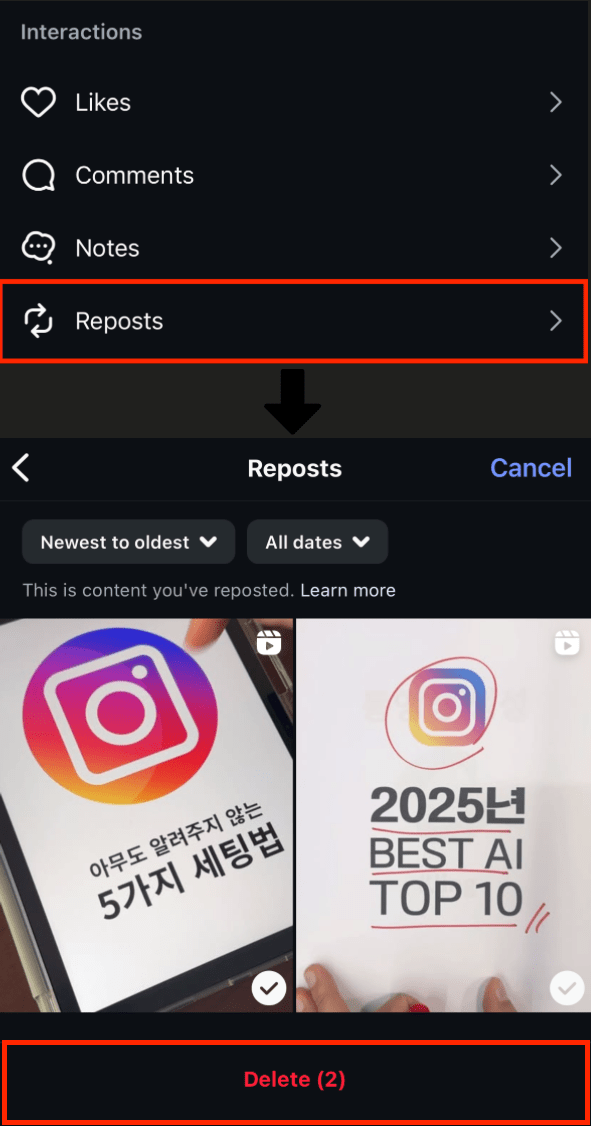
📌 Method 2: Batch Delete Reposts from Settings
To manage multiple reposts at once, follow this path:
[Top Right ☰] → [Your Activity] → [Reposts] → [Delete]

⚠️ Important Notes When Deleting Reposts
- Menu names, button locations and bulk selection can differ by account and app version. If the settings route is unavailable, open the original post and check your active repost button.
- The official announcement does not establish whether removing a repost sends a notification. Do not treat removal as a guarantee that nobody saw it.
- Removing your repost does not prevent a later repost if the original remains available and Instagram allows it. Do not assume that a removed note or the previous repost state can be restored.
📝 Conclusion
Just as reposts are easy to share, they're also easy to manage. Use these two methods to keep your feed clean and organized.
Related articles